

When I first found out that I had an allergy to gluten, the most devastating thing about it all was that I would have to give up my beloved bread. I love bread, especially freshly baked artisan breads with thick, crunchy crusts and soft, fluffy interiors. In all honesty, there really is nothing like it, and the thought of no longer being able to have it was absolutely soul crushing. The gluten free store bought breads I have tried in the past have been nothing short of disappointing, and the recipes I have found online have always turned out to be duds. I refused to accept that my gluten allergy meant the end of bread for me, or I guess I should say good bread, but I was utterly clueless on where to start in order to change that.
Then it hit me. The only thing that can be making the bread turn out flat, dry and cardboard-like was the flour I was using and the lack of yeast. I had always attempted to make bread with your run of the mill, gluten free all-purpose variety, but the problem with premixed all-purpose flours in gluten free baking is that they don’t always work for every purpose, i.e., bread, so I began my research into different gluten free flours and starches. My findings? Make your own flour! A lot of things go into gluten free flours, but it is nowhere near as intimidating to make as it sounds, plus it is far cheaper!
In order to make a blend that works, you are going to want a 40/60 ratio: 40% whole grain and 60% flours/starches.
Whole grain flours include:
brown rice flour
buckwheat flour
corn flour
mesquite flour
millet flour
oat flour
quinoa flour
sorghum flour
sweet potato flour
teff flour
White flours/starches include:
arrowroot starch
cornstarch
potato flour
potato starch
sweet rice flour or short grain brown rice flour
tapioca flour
white rice flour
Obviously, there are a lot of choices here, but in order to make a light and airy bread, you need to use flours and starches that aren’t too heavy or dense. I created my own blend based based off of my own research into this, and this is now my go-to gluten free bread flour. A couple of things you will need to get started is a sifter, a high speed blender (at least 200 watts) or a coffee or herb grinder, and a digital scale. When making your own flours, a digital scale is necessary because measurements are not the same between each flour. For example, my recipe calls for equal amounts (200 grams) of both millet and oat flour, but because millet flour is so much more dense than oat flour, it actually ends up taking 2 cups of oat flour to make the same amount as 1 cup of millet flour. This is where a lot of recipes can get messed up, so it is crucial to invest in an accurate digital scale. I use the Oxo 11-Lb Digital Food Scale with Pull-Out Display which is around $50, but you can find plenty of good quality cheaper versions out there as well.
I personally find it to be easiest to buy the grains in whole form and blend them yourself into a fine flour. It is much more expensive to buy the flour premade than it is to make it yourself, plus you can use the leftover grains and starches in other recipes down the road.
One other note – make sure that you do not use regular brown rice in place of short grain brown rice. This recipe needs the short grain variety in order to create a binding texture, as short grain rice is more ‘sticky’ than regular brown rice.
Recipe: Best Ever Gluten Free Bread Flour
Summary: A gluten free, light and airy bread mix flour blend
Ingredients
- 200 grams of gluten free oat flour -7.05 oz (2 cups)
- 200 grams of millet flour – 7.05 oz (1 cup)
- 300 grams of short grain brown rice flour- 10.6 oz (1.5 cups); must be short grain
- 300 grams of potato starch and arrowroot starch- 10.6 oz total- I used 6.3 oz arrowroot and 4.3 oz potato starch
Instructions
- With a high speed blender, coffee grinder or herb grinder, make oats, millet and short grain brown rice into a fine flour.
- Using a digital scale, weigh each to the appropriate amount in ounces, and sift into a large mixing bowl.
- Weigh potato starch and arrowroot starch and add into the bowl.
- Thoroughly mix flours with a whisk or slotted spoon until they are well blended.
- Store in a tightly sealed container until ready to use.
Preparation time: 30 minute(s)
My rating
Now that you have your bread flour blend, you need a recipe to make it into the best ever gluten free bread. The key to making this bread soft and fluffy like regular bread is the addition of gluten free active dry yeast. Now, I tried hard, and I mean HARD to find a way to activate the yeast without the use of regular white sugar, but so far I have come up empty handed, and it is crucial that the yeast be activated prior to using it in order for it to work. The good news is that it only requires 1/4 tsp. of regular white sugar to do this, and the rest of the sugar called for in this recipe is stevia. If you have found another way to do this without the use of plain white sugar, I would love to know in the comments below, but otherwise, this miniscule amount shouldn’t do too much damage.
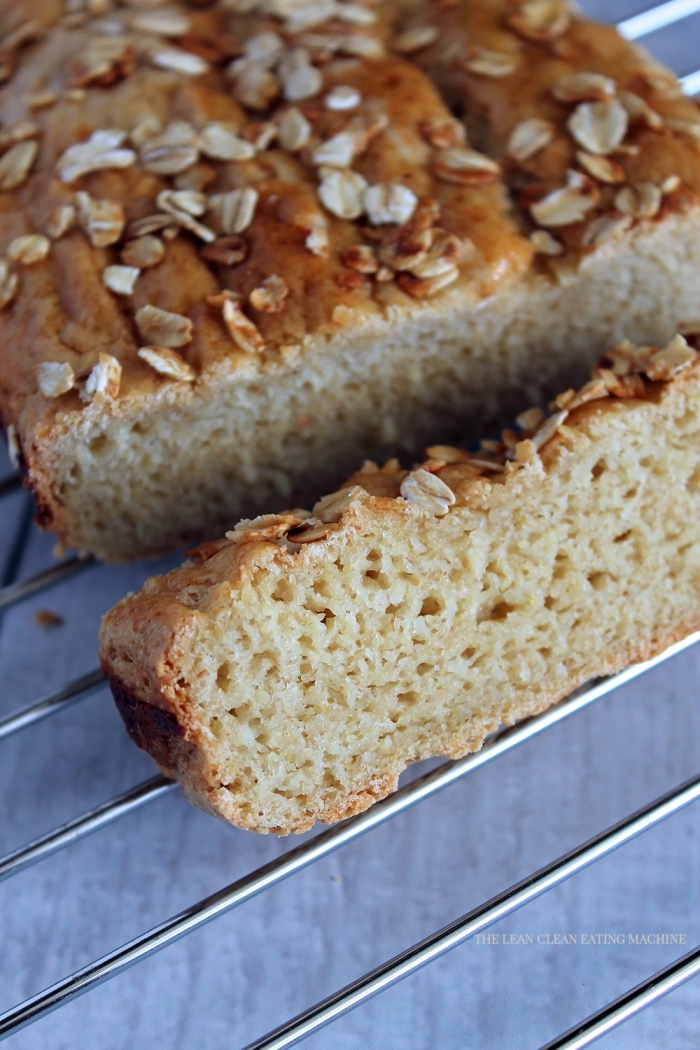
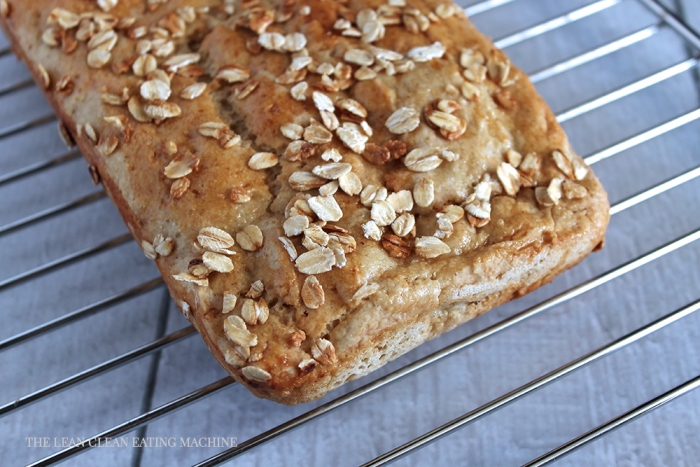
To make the honey oat version you see pictured, just add gluten free rolled oats to the top of your honey glaze before placing the loaf in the oven to bake.
This bread is not sandwich bread as much as it is bread that you munch on, toast, eat for breakfast, etc., so keep that in mind upon making it. This bread recipe would work outstanding as dinner rolls as well.
- 1 packet (roughly a little over 2 tsp.) dry active yeast
- 1/4 tsp. regular white sugar
- 1/4 cup warm water (105-110°)
- 2¾ cups (11½ oz.) LCEM Custom Gluten Free Bread Flour Blend
- 1½ tsp. xanthan gum
- ¼ cup stevia in the raw granulated baking sugar
- 1 tsp. kosher salt
- 3/4 cup warm water (105-110°)
- 2 Tbsp. olive oil
- 1 flax egg (1 Tbsp. ground flax seed + 1/4 cup warm water; (preferably room temp, so don’t refrigerate)
- 1 tsp. raw apple cider vinegar
- 1 Tbsp. raw natural honey mixed with 2 Tbsp. water to thin
- Preheat oven to 400F.
- In a bowl, dissolve 1/4 tsp. white granulated sugar in 1/4 cup warm water.
- Add in 1 packet of gluten free active dry yeast and mix to dissolve.
- Yeast should begin to foam within 5 minutes.
- In the mixing bowl of your electric mixer or food processor, mix together flour, xanthan gum, yeast, sugar, and salt.
- With mixer running on low speed, add in the water, olive oil, flax egg, and cider vinegar. I mix the olive oil and vinegar into the flax egg prior to pouring it in.
- Mix on high speed 3 minutes. This is a very wet dough, so do not be surprised by how sticky it is. It is supposed to be this way.
- Spray a loaf pan with non-stick cooking spray and pour dough into pan.
- Run your hands under warm water and use wet hands to evenly distribute the dough and smooth over the top.
- Cover pan with a dry towel and let rise in a warm place for 45 minutes to 1 hour. I set my pan on my top of my stove where the heat from the oven comes out to speed up the process.
- When dough has risen to double the size, mix honey with water until you have a really runny consistency and honey is completely dissolved.
- With a pastry brush, coat the the top of dough with honey mixture like a glaze.
- Place pan in oven on middle rack and bake for about 27-29 minutes, or until crust of bread is golden brown.
- Remove bread from oven and let sit for 5 minutes before carefully transferring loaf to a wire rack to cool.
- Let bread cool completely before storing.
- When first baked, store homemade gluten free bread in a breadbox. A closed breadbox will retain some moisture, so the bread doesn’t dry out, but not so much that it will make the bread soggy.
- Store leftover bread that is older than 3 to 4 days (depending upon humidity levels in your kitchen) in the freezer. To prevent freezer burn, first wrap bread tightly in a freezer-safe wrap.