You know that feeling. The camera comes out, someone says “smile,” and suddenly your face forgets what it normally does. The result is a photo where you look nothing like yourself. You’re not alone, and the fix has nothing to do with finding a magic filter.
Looking genuinely good in photos comes down to four things you can practice before the shutter ever clicks: body position, lighting, expression, and a smile you actually feel confident wearing. Each one matters. None of them requires professional equipment or a photography degree. What follows is the practical breakdown you’ve been missing.
Why So Many People Dread the Camera
The struggle is real, and the numbers back it up. A 2025 study found that 64% of Americans hide or change their smile when taking photos, making photography the single leading trigger for smile suppression. That same research found 56% say smile self-consciousness affects their overall confidence, and 62% regret not smiling more freely throughout their lives.
That’s a lot of missed moments, closed-mouth grins, and photo albums full of “almost” versions of yourself. The good news is that nearly every expert on photogenic posing agrees on something refreshing: looking great on camera is a learnable skill, not an inherited trait.
Posture Does More Than You Think

Before you worry about your smile, fix your body. According to AiProPortrait’s posing guide, good posture instantly makes you look more confident, taller, and leaner in photos. Slouching pushes your chin into your neck and rounds your shoulders, two things the camera reads harshly.
The classic photographer’s cue works: imagine a string pulling the top of your head toward the ceiling. Roll your shoulders back and down before the photo, not up and in. Then angle your body about 45 degrees from the camera and turn your head back toward the lens. That single rotation slims your silhouette, adds depth, and gives you dimension you simply can’t get standing square-on.
Your weight distribution matters too. Shift roughly 70% of your weight onto the foot farther from the camera. This creates a natural S-curve in your stance that reads as relaxed and grounded rather than stiff. Your arms benefit from the same principle. Press them flat against your sides and they flare outward, making them appear wider than they are. Instead, leave a small gap by resting a hand on your hip, slipping a thumb into a pocket, or holding something slightly away from your body.
One last body tip that’s easy to miss: extend your neck slightly toward the camera and tilt your chin just a touch below eye level. This defines the jawline naturally and removes any hint of a double chin, regardless of the angle.
Light Is the Variable That Changes Everything
You can nail your posture and still end up with a terrible photo if the light is working against you. Harsh overhead lighting creates unflattering shadows under your eyes, nose, and chin. Direct midday sun does the same. The camera doesn’t soften these the way your eye does in person.
Natural, soft light is your best friend. A window with indirect daylight, a shaded spot outdoors just before sunset (golden hour runs roughly 45 to 60 minutes before sundown), or an overcast sky all produce the kind of even, flattering illumination that makes skin glow instead of wash out. Position yourself so the light falls across your face from the front or at a slight angle. Facing directly away from the light source puts your face in shadow. Facing directly into harsh light causes squinting.
If you’re indoors without ideal window light, position a simple white reflector or even a white foam board just below and in front of your face. It bounces available light upward and fills the shadows that flatten your features.
The Real Secret Behind a Photogenic Smile
Here’s something photographers say constantly: what makes a smile photogenic isn’t the teeth, it’s the warmth in your eyes. A technically “perfect” set of teeth with a fake, performed grin reads as uncomfortable every time. The eyes give it away.
The science has a name for this. A genuine smile, known as a Duchenne smile, activates the orbicularis oculi muscles around the eyes, creating subtle crow’s feet and slightly squinted lower lids. A forced smile only moves the mouth. The camera catches the difference immediately.
To trigger a real smile on demand, think of a specific memory that genuinely makes you laugh right before the shutter clicks. Not a vague happy thought. A specific moment, a specific person, a specific punchline. That specificity produces a real emotion, and the emotion produces the right expression in your face without you having to manufacture it.
Another technique: try the “squinch.” Coined by photographer Peter Hurley, it involves subtly narrowing just the lower eyelid, maybe 10 to 20 percent, while keeping your upper lids open. It projects confidence instead of that deer-in-headlights wide-eyed stare. Practice it in a mirror a few times before your next photo session and you’ll feel the difference immediately.
“People who look consistently photogenic have developed unconscious habits. They know their angle, they naturally relax their shoulders, and they’ve learned how to smile genuinely on cue. All of these are learnable skills.” — PoseOverlay Photography Guide
Your Smile and Your Confidence Are Connected
Photo anxiety isn’t just about vanity. The same 2025 study noted that 44% of Americans say smile self-consciousness has held them back professionally, and 46% said it affected their romantic lives. That’s a real-world cost to hiding your face from cameras.
For people who genuinely aren’t happy with the appearance of their smile, the path forward often involves orthodontic care. Alignment changes how your smile photographs because straight teeth reflect light more evenly and give your face symmetry that cameras respond to. People in the Atlanta area exploring that option often research brookhaven braces at Brookhaven Orthodontics, where metal braces and clear aligner options are offered for patients of all ages. Addressing alignment doesn’t just change a photo. It builds the kind of baseline confidence that carries into every area of your life.
Clothing and Color: Small Choices, Big Impact
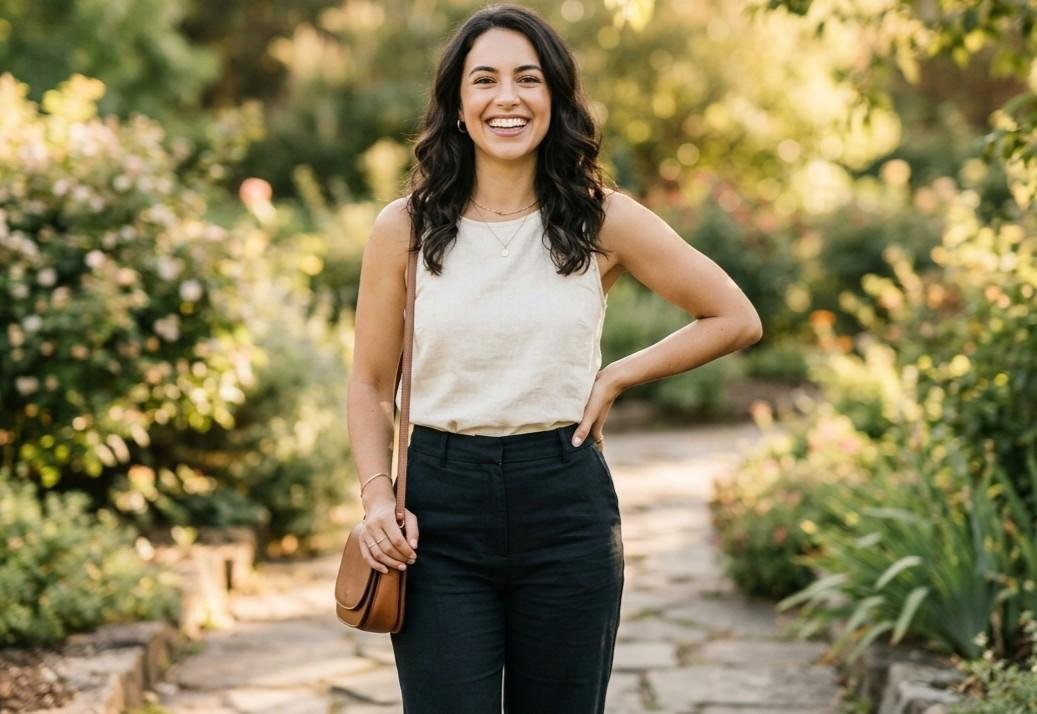
What you wear affects how you photograph more than most people account for. Busy patterns, logos, and thin stripes create visual noise that the camera renders as a distracting shimmer called a moiré effect. Your face becomes secondary. Solid colors in mid-tones photograph consistently well on almost every skin tone: navy, teal, burgundy, olive, and charcoal are reliable. Avoid pure white (it can blow out under light) and pure black (it absorbs light and loses your shape).
Good fit matters as much as color. Clothes that fit your actual body let the camera see your shape. Oversized layers read as formless, while very tight fits pull and distort. The goal is clothing that sits smoothly and lets your posture do the work. Choosing the best fabric choices can help too, since materials that drape cleanly and resist bunching tend to photograph more naturally.
A Quick-Reference Comparison: Forced vs. Natural Expression
| Element | Forced / Common Mistake | Natural / What Actually Works
|
|---|---|---|
| Smile trigger | Saying “cheese” or thinking “look happy” | Recalling a specific funny memory or person |
| Eyes | Wide open, tense | Lower lids slightly narrowed (squinch), upper lids relaxed |
| Shoulders | Raised and tight | Rolled back and down before the shot |
| Body angle | Square on to the camera | 45 degrees to the camera, head turned toward lens |
| Weight distribution | Equal weight on both feet | 70% on back foot, slight bend in front knee |
| Arms | Pressed flat against sides | Hand on hip or loosely in pocket, gap at sides |
| Chin position | Pulled back or tilted up | Slightly forward and down toward camera |
| Lighting | Direct overhead or midday sun | Soft, indirect natural light from the front or side |
A Practical Pre-Photo Checklist
Run through this before the next photo, whether it’s a casual group shot at dinner or a professional headshot:
1. Roll shoulders back and down. Do it twice. The first roll rarely sticks.
2. Shift your weight to your back foot and let your front knee relax with a slight bend.
3. Angle your body 45 degrees from the camera, then turn your head back toward the lens.
4. Extend your neck forward slightly and tilt your chin just below eye level.
5. Leave a small gap between your arms and your torso by resting a hand on your hip or in a pocket.
6. Think of something specific that makes you laugh. Give yourself three full seconds with that thought before smiling.
7. Narrow your lower lids slightly right before the shot, keeping your upper lids open and relaxed.
8. Check your light source. Make sure it’s in front of you, not directly above you or behind you.
Practice each step individually in front of a mirror first. Within a few sessions, the sequence will feel automatic rather than like a performance, and that automaticity is exactly what reads as natural on camera.
Building Photo Confidence Over Time
One overlooked truth about becoming more photogenic: it’s cumulative. Every time you see a photo of yourself that you actually like, your confidence in front of the camera grows a little. Collect those wins. Save the shots that felt good. Review what you did differently in them. You can also explore a guide to Boudoir photography to learn how thoughtful posing, lighting, and body positioning can help you feel more comfortable and confident in front of the camera.
The goal isn’t to look like someone else’s version of beautiful. It’s to show up in photos as the version of yourself you actually experience in real life. That version is warmer, more relaxed, and far more compelling than the stiff, self-conscious person most cameras currently capture. The gap closes with repetition, not perfection.
Start with one thing from the checklist above. Just one. Try the weight shift. Try the angle. Try thinking of the specific funny memory before your next group photo. Small adjustments compound quickly, and you’ll be surprised how different you look in a photo when you’re actually present in it instead of bracing for the flash.